17 Brilliant Stair Riser Ideas for a Stunning Entryway Makeover!
I used to walk past my stairs every day without giving them a second thought. But one morning, while wiping down the banister, I noticed how bland the risers looked.
That’s when it hit me, these little strips have so much untapped potential.
A few simple changes here can totally shift the feel of your hallway. I’ve tried some of these ideas myself, and they made a world of difference.
Let me walk you through eight ways to turn boring stair risers into something that feels personal and fresh.
1. Painted Patterns

I started with paint because, honestly, it’s what I had in the garage. I taped off a few simple stripes and used two leftover wall colors. The result? Clean, modern, and surprisingly cheerful.
You don’t need fancy tools. Just some painter’s tape and patience. Stencils also help if you want a repeat pattern, like diamonds or little leaves.
And if you’re the bold type, paint each riser a different color. It adds energy and makes your staircase feel more like part of the home.
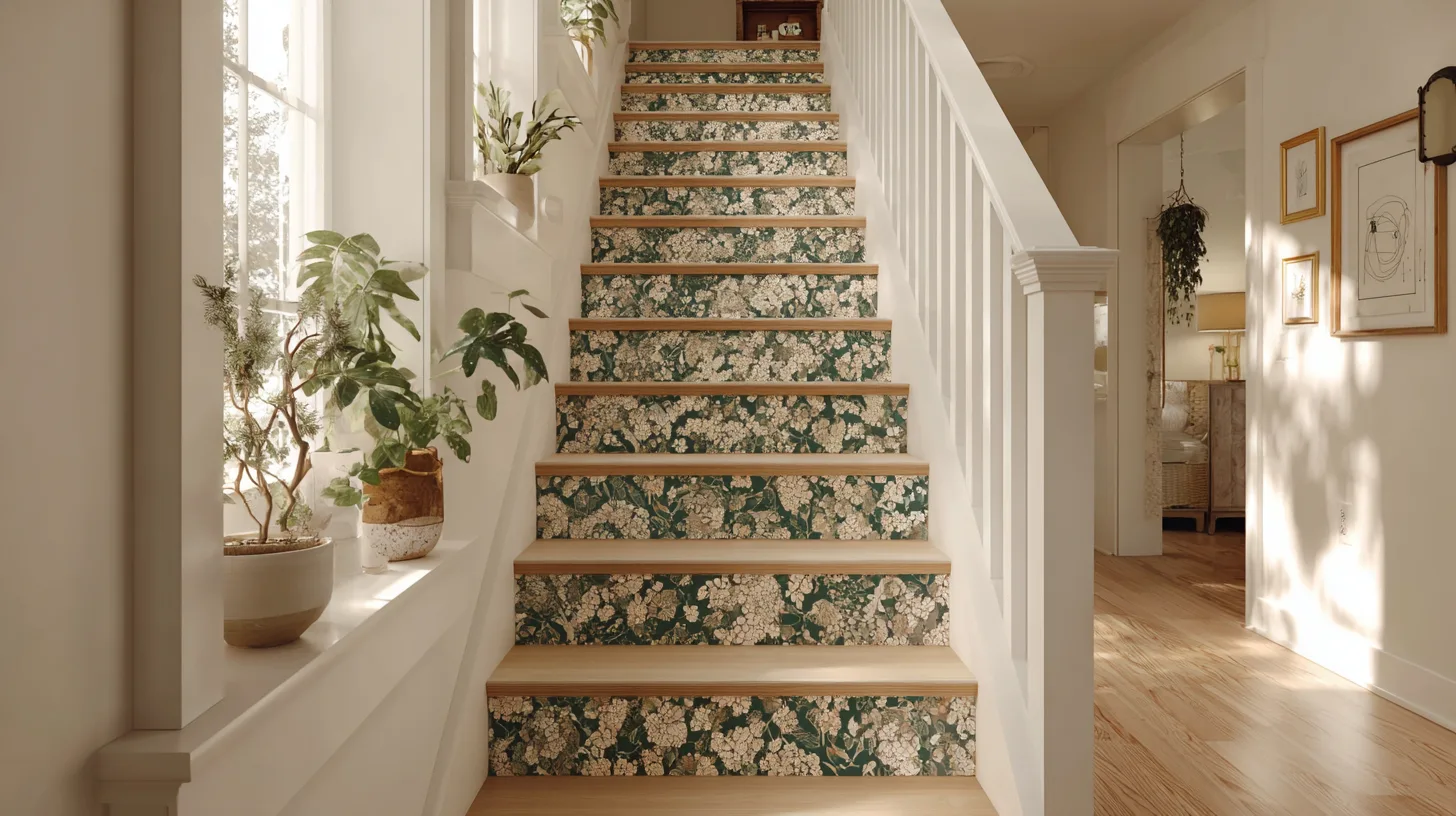
2. Peel-and-Stick Wallpaper

When I wanted a quick change without the mess of paint, I turned to peel-and-stick wallpaper. I found a roll with a subtle blue floral print and cut it to size.
It’s great because you can remove or swap it anytime. Perfect for renters or anyone who likes to change things up often.
Just remember to wipe the surface clean first, then measure each riser separately. They’re rarely the same size, which I learned the hard way!
3. Wood Slats or Panels

A friend of mine added thin wooden panels to her stair risers, and it looked so warm and homey. I was jealous! She stained them to match her floors, and it pulled everything together beautifully.
This is a slightly bigger project, but nothing too scary if you have a saw and wood glue. Pre-cut panels also work great.
If you’re into a farmhouse or natural look, this one’s a winner. And yes, it hides scuffs really well, goodbye constant cleaning.
4. Tile or Tile Stickers

I love the look of tile, especially the kind you see in Mediterranean homes. But real tile is a project. So I went with tile stickers, and you wouldn’t believe how real they look.
They come in all sorts of patterns. I used black and white ones that mimic vintage ceramic tile.
If your stairs are near the kitchen or entryway, this adds a nice touch. Just stick them on clean risers and press firmly. That’s it.
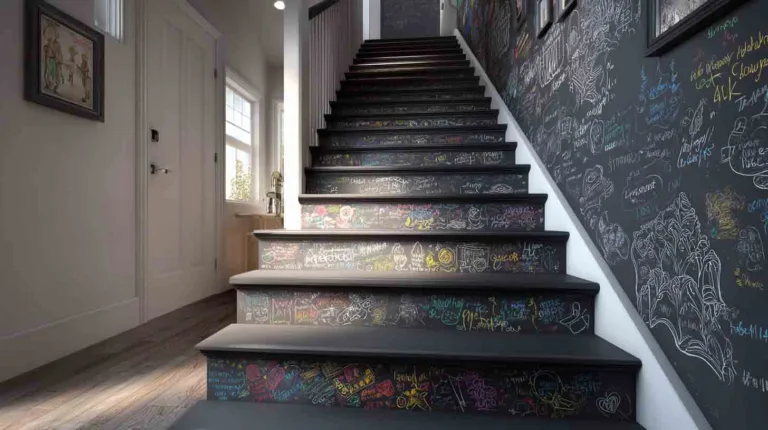
5. Chalkboard Paint

I tried this on my basement stairs, and it turned out to be such a fun idea. I painted the risers with chalkboard paint, and now the kids leave notes or drawings every week.
You can write welcome messages, grocery reminders, or just scribble for fun. It adds personality in a casual way.
Best part? You can wipe it clean with a cloth. I keep a piece of chalk in a little jar nearby. It’s a small thing that makes people smile.
6. Book Spine Illusion

This idea was perfect for the bookworm in me. I saw it online, and immediately painted my risers to look like the spines of my favorite novels. It took time, but it was worth it.
Each step has a title, and it kind of feels like walking through a personal library. Guests always stop and read them.
You can use stickers too, or even print and paste images of real book spines. It’s a great touch for hallway stairs near your study.
7. Fabric or Canvas Wraps

Now, this one’s a bit different, but I loved the soft look. I used strips of canvas fabric and attached them with a staple gun. It gave the stairs texture without being too bold.
I used neutral colors, beige and cream, which worked well with my wall color.
Also, I noticed the stairs were quieter after. No more clunky sounds when someone runs up or down. So bonus points for peace and quiet!
8. Numbers or Quotes

One of the easiest things I’ve done, adding numbers to each step. Just a small vinyl number sticker, starting from 1 at the bottom.
You can also add short quotes or even your family’s names. I did a mix, numbers on one staircase and quotes on the other.
It’s simple, sweet, and adds that “you” feeling without being over-the-top. Plus, little kids love counting as they go up.
9. Mosaic Tiles

I’ve always loved mosaic art, so one weekend I picked up some small mosaic tiles at a clearance sale and decided to try them on my stair risers. It turned out to be a creative little project that brought unexpected charm to my hallway.
The patterns didn’t have to match perfectly. I actually liked the slightly random feel—it gave the stairs character.
If you want the look without the mess, mosaic tile stickers work just as well and are much faster to apply.
10. Vintage Postcards or Maps

I had a stack of vintage postcards from my grandma, and I couldn’t bring myself to toss them. So, I used them to decorate my stair risers. I arranged them like a little gallery across each step.
For another project, I used cutouts from an old world map. It made my staircase look like something out of a travel magazine.
All I needed was a glue stick and a sealant over the top. It was meaningful and easy.
11. Stenciled Designs

This one surprised me with how easy it was. I found a few reusable stencils online, taped them to my risers, and gently dabbed on paint with a sponge. It felt almost therapeutic.
You can keep it simple with one pattern or mix a few for a more playful vibe. I went with a floral shape and loved the results.
It’s a low-cost option if you already have paint at home, and you can match it to your room style easily.
12. Mirror or Reflective Film

I once helped a friend with a tiny, dark hallway, and this trick saved the space. We cut adhesive mirror film and applied it to the risers. Boom, instant light and a more open feel.
It bounced natural light beautifully, especially near a window. And it made the staircase feel deeper.
Just be sure to clean the surface before applying or you’ll get bubbles. A little patience goes a long way here.
13. Rustic Metal Sheets

I came across thin, weathered metal panels at a salvage shop and had to try them. I cut them to fit and glued them onto my risers for a rustic, farmhouse vibe.
They added an industrial charm, without looking cold. And surprisingly, they held up well to foot traffic.
If you can’t find old panels, you can use metal contact paper. Looks just as good and no sharp edges to worry about.
14. Painted Ombré Effect

One of the prettiest staircases I’ve done had an ombré paint effect, starting light at the bottom and gradually getting darker as you go up.
I used four shades of the same color and blended the transitions with a sponge brush. It took a bit of planning, but the results? So worth it.
If you’re unsure where to start, grab a paint swatch card and go from there. It’s subtle but stylish.
15. Washi Tape Accents

When I wasn’t ready to commit to paint or wallpaper, I used washi tape to create patterns. You can do stripes, criss-crosses, even little borders along the edges.
It’s super forgiving. Mess up? Just peel it off and try again. I did this with my niece and she loved helping out.
Bonus: washi tape comes in so many colors and patterns, it’s easy to match your decor.
16. Marble Tiles

I had leftover marble-look tiles from a bathroom update, so I decided to try them on the stairs. Wow. The risers looked so polished and clean afterward, like something out of a magazine.
The marble gave the steps an upscale feel without actually costing much. I used adhesive tile panels, so no grout was needed.
If you love classic, clean design, this one might be your favorite. It pairs nicely with white or dark stair treads.
17. Inspirational Word Labels

Last but not least, I added one word to each riser, kindness, courage, love, patience, and so on. It was something I did for myself during a tough year.
I used vinyl stickers at first, then later painted over them for a more permanent feel. The words became little reminders.
If you’re more private, use words that mean something only to you. It becomes your own quiet affirmation space.
Conclusion
I never thought something as small as stair risers could make such a difference. But now, every time I pass them, they make me smile, or at least make the house feel a little more “mine.”
You don’t need a renovation or a massive budget. Just pick an idea, try it out, and enjoy the change.
And who knows, you might get hooked like I did and start planning the next stair makeover before you’re even finished with the first.

